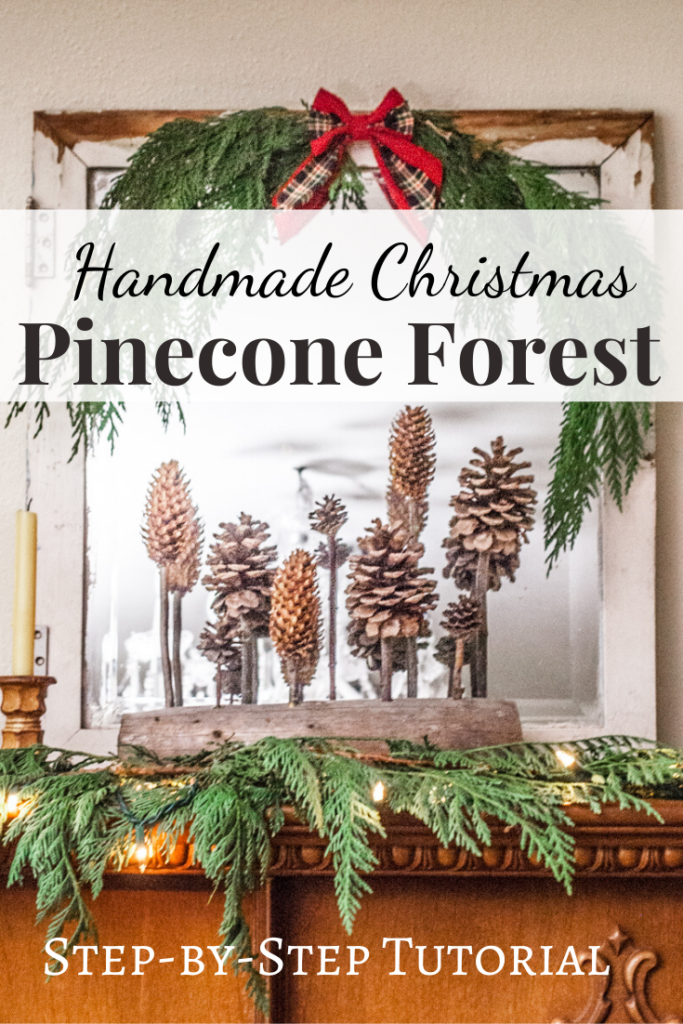
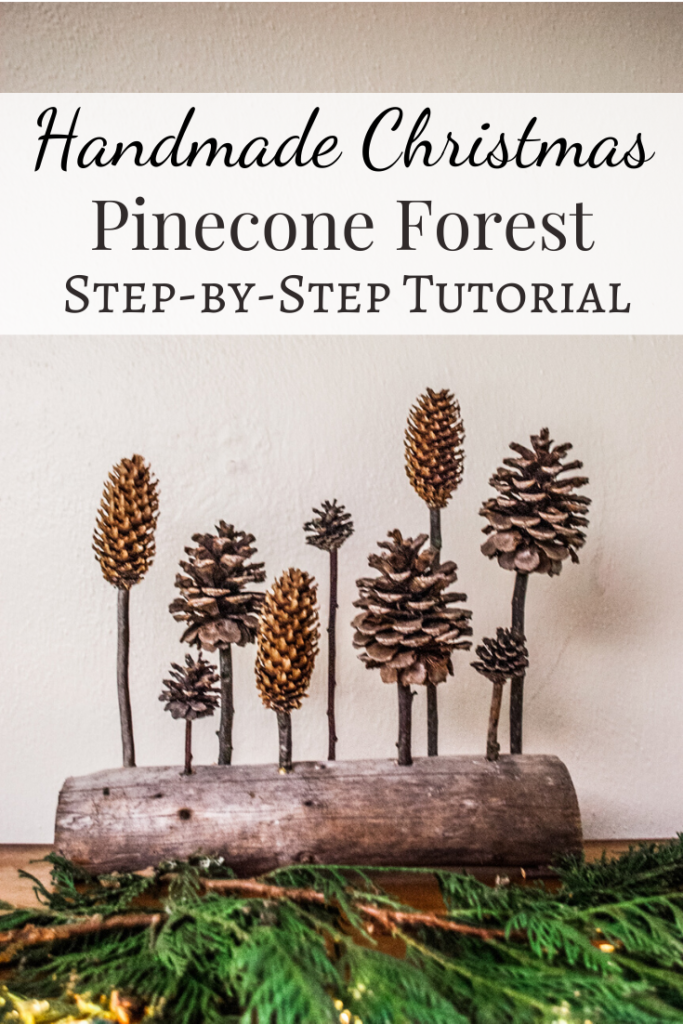
This awesome Pinecone Forest Sculpture Decor Thingy? Well, it’s definitely the coolest thing I’ve made in a while. Really, it turned out SO well, and it’s pretty easy to make!
This Sculpture is part of my Handmade Christmas Series, which is totally loaded with amazing, rustic ideas for all your Christmas crafting needs. Check out the rest of the series here:
- Rustic Little Tree Ornament
- Easy Fabric Wrap Ornaments
- Mini Christmas Tree Mobile
- The Simple Star
- Mini Christmas Trees
- Pinecone Door Hanger
- Cinnamon Stick Christmas Cross
- Simple Pinecone Garland
- Simple Pinecone & Bow Ornaments
- No-Sew Fabric Bow Garland
- Pinecone Forest Christmas Decor
Supplies you will need:
- Small log
- Sticks
- Pinecones of various sizes
- Drill
- Clippers
- Hot glue gun and glue
Instructions:
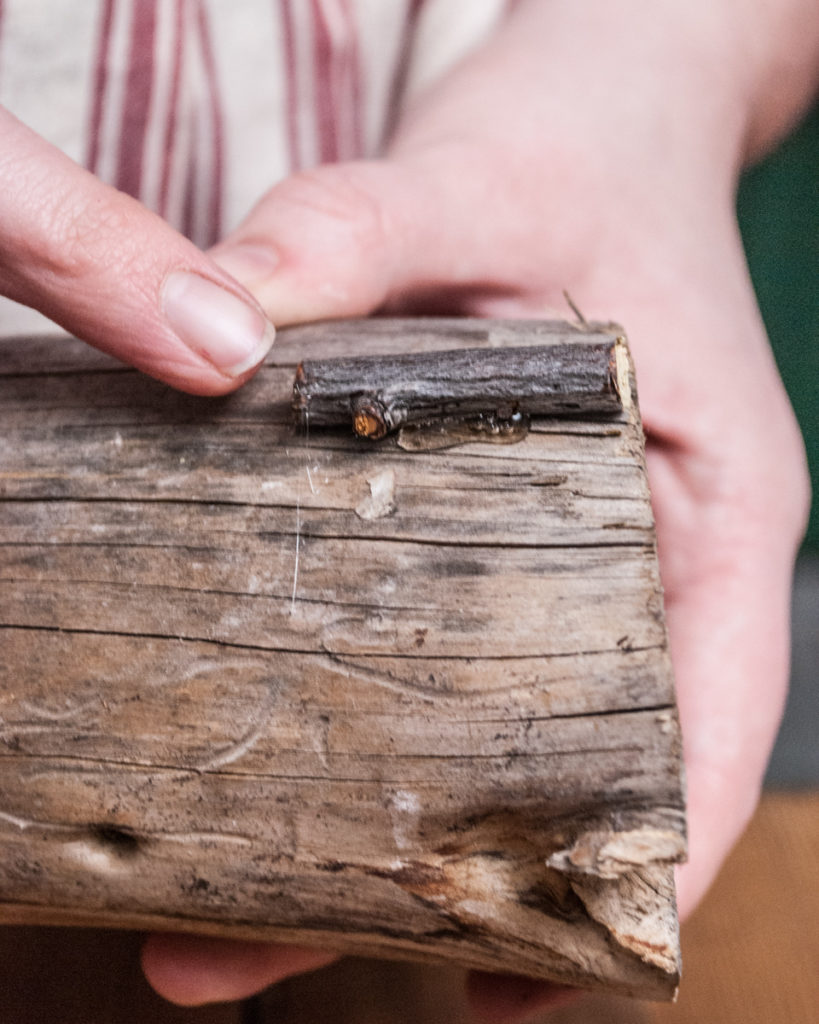
The first thing you will need to do is to make sure that your base is stable. This log that I chose from our woodpile was pretty straight, but as you can see, I glued a little twig to the bottom to make it very strong.
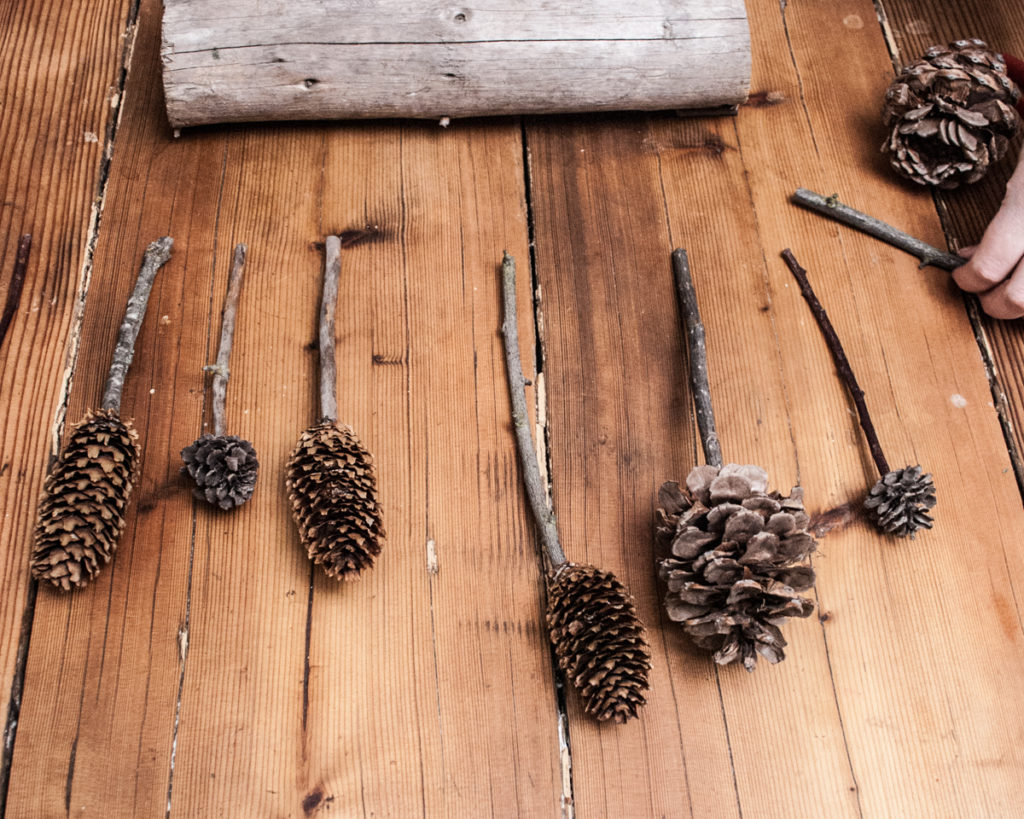
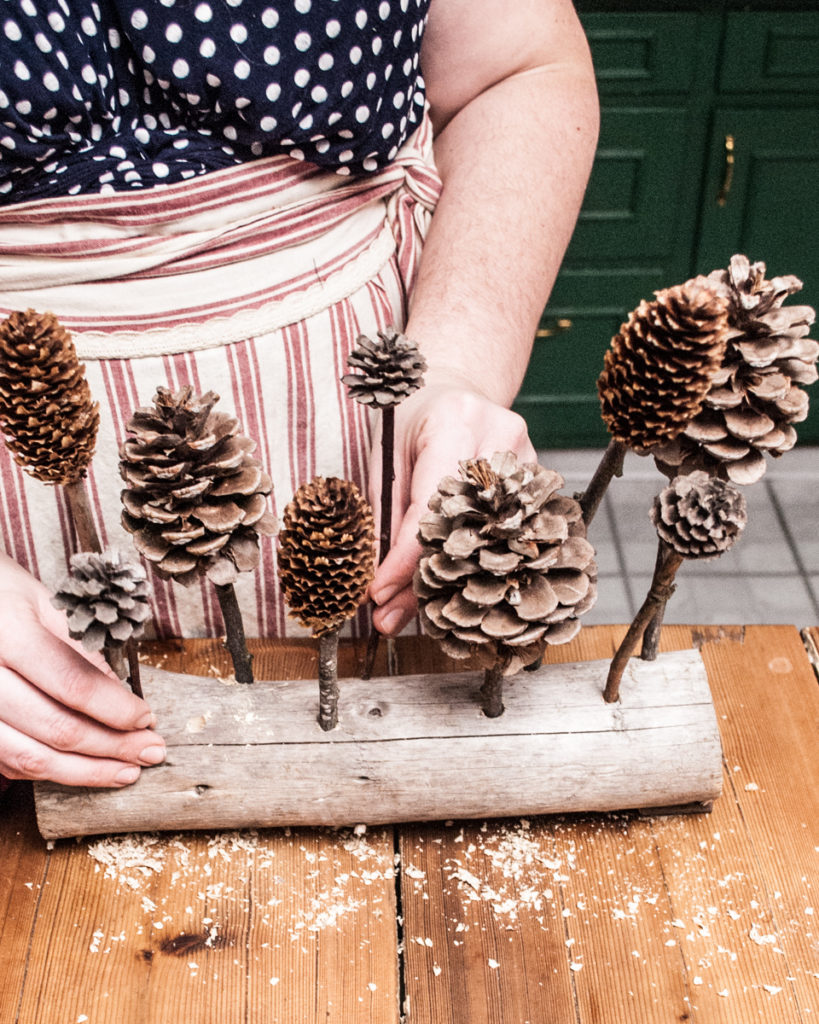
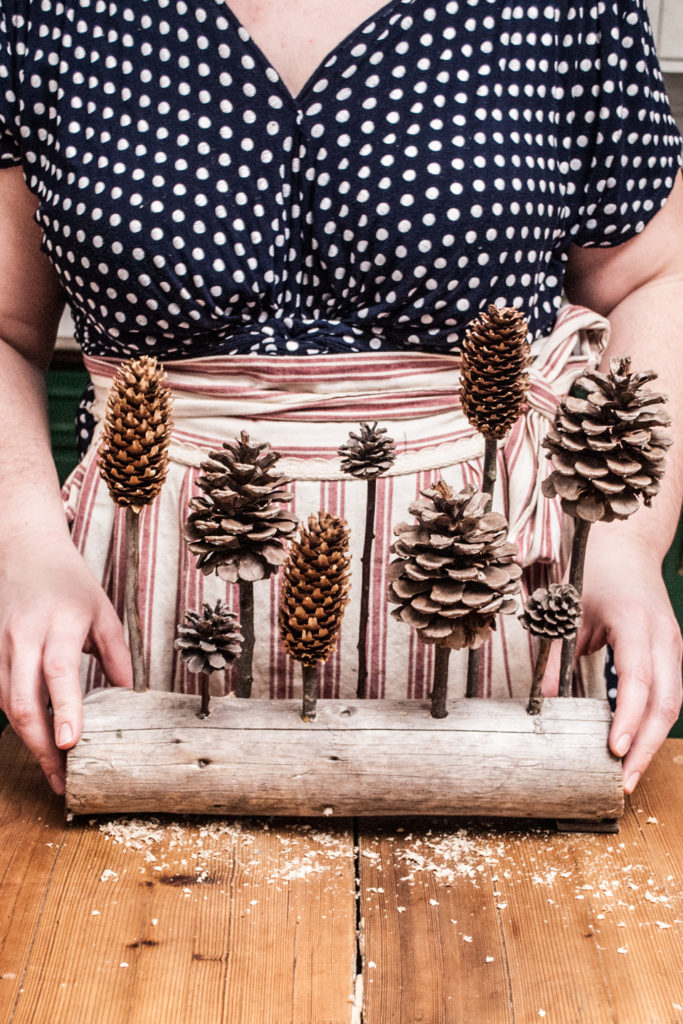
Next I lined up all my pinecones and sticks to make sure that I liked the arrangements, and make any adjustments.
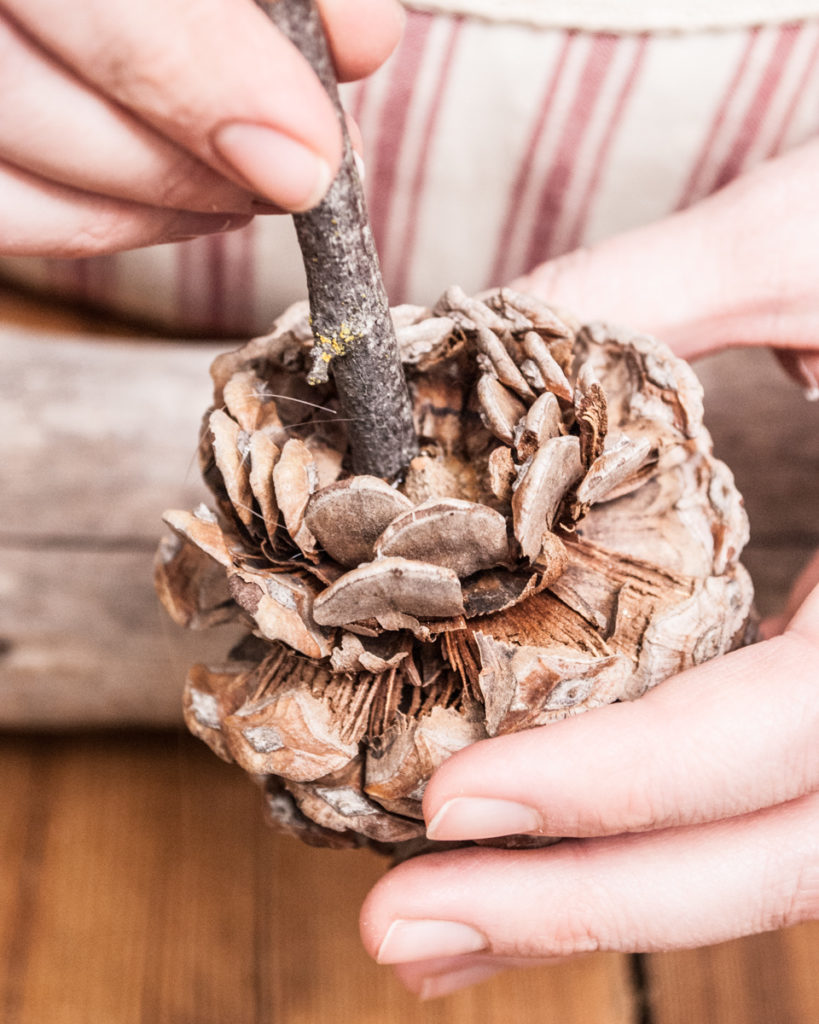
Ok, time to make some little pine cone lollipops! Now this part does take some time, because the stick must be held at the perfect angle for several minutes to make sure they are straight.
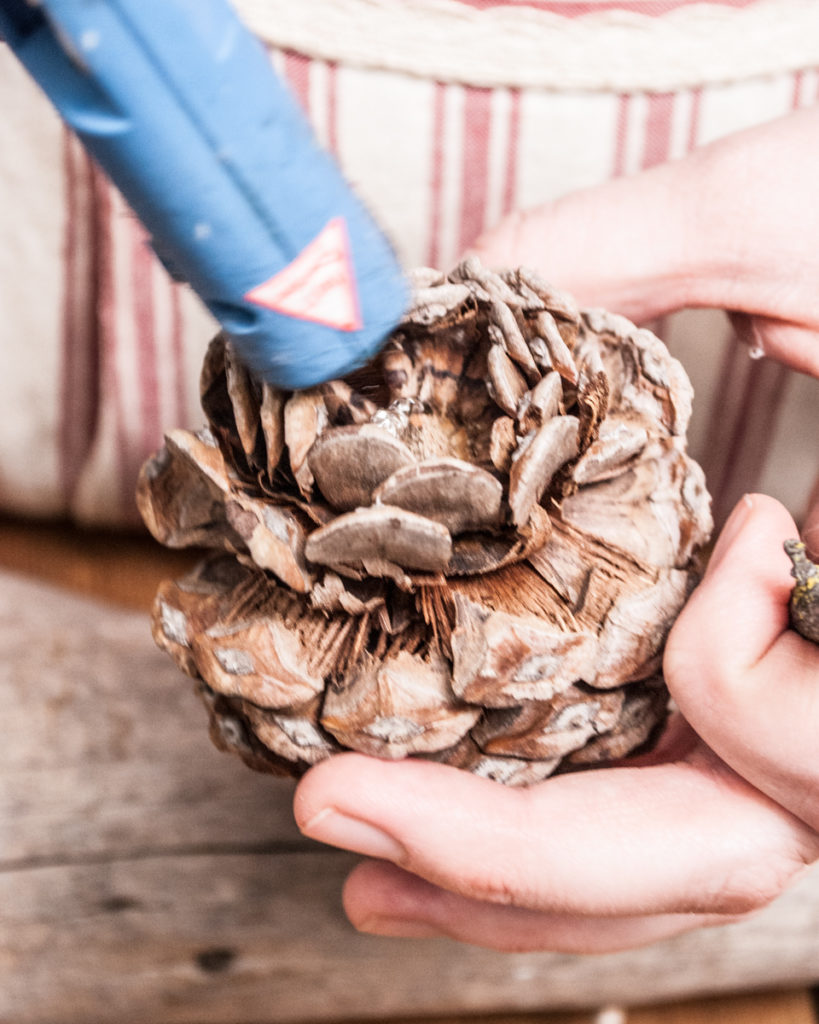
I just put a generous dollop of glue in the bottom of the pinecone, then hold the stick in for about three minutes. It takes some time but it will be worth it!
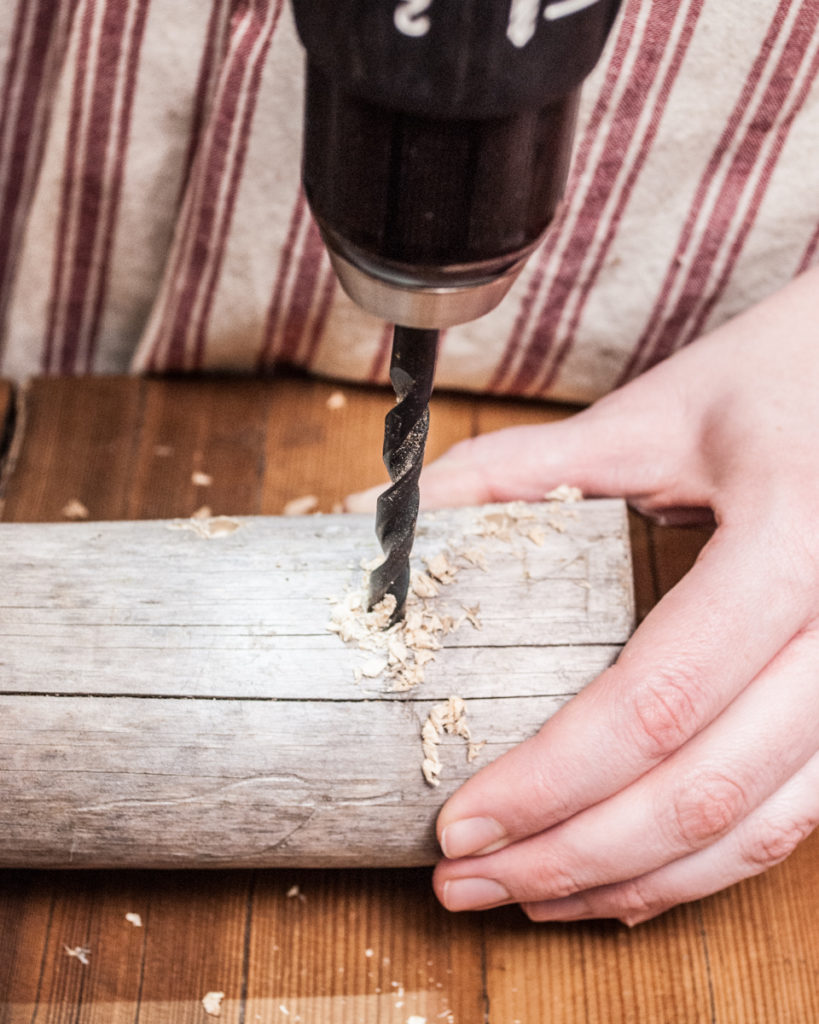
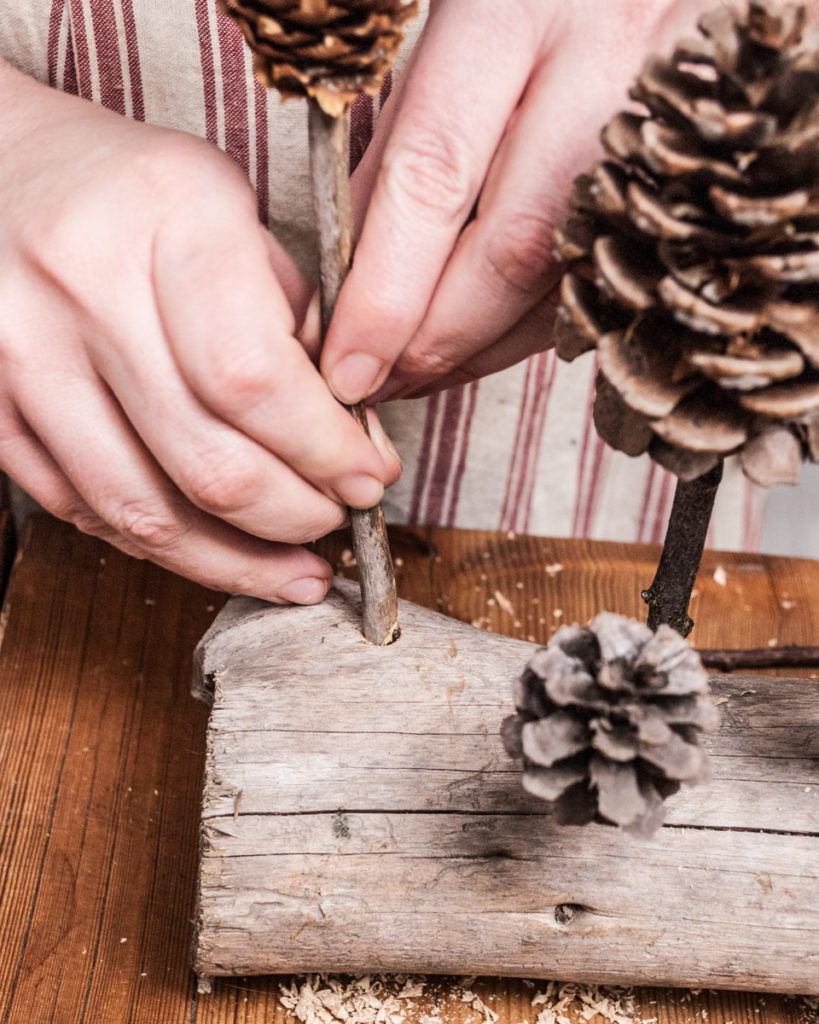
I used a drill to make holes in log. I made the holes about half an inch deep, and just barely big enough for the sticks to fit in.
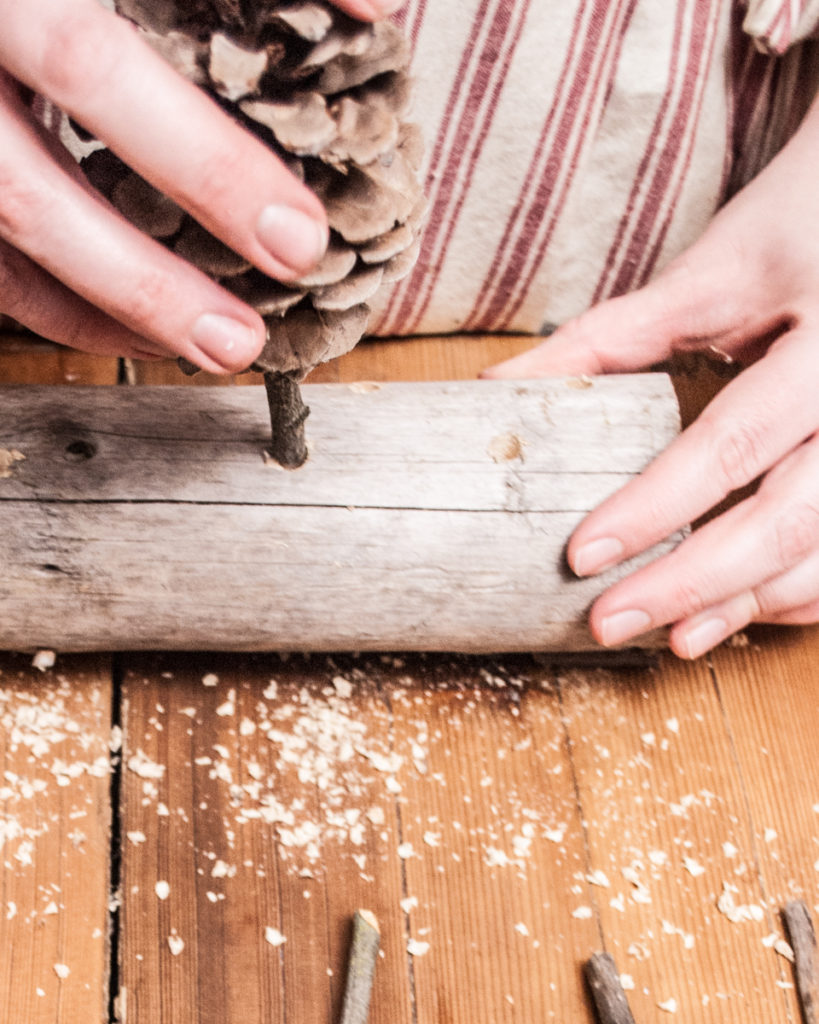
This next step is important! Do a “dry fit” of all your pinecone lollipops. This means that you just put all the pinecones in the holes, even if they are wobbly, to make sure you like the way the final arrangement will look. This is the last chance to shift things around or trim the sticks to a better height.
When I was happy with my arrangement, I just put some glue in the holes and held the sticks in place for a few minutes while the glue cooled!
And that’s it! Not to tricky, but it does take a little more time to make sure that the glue is cooling in the right position!
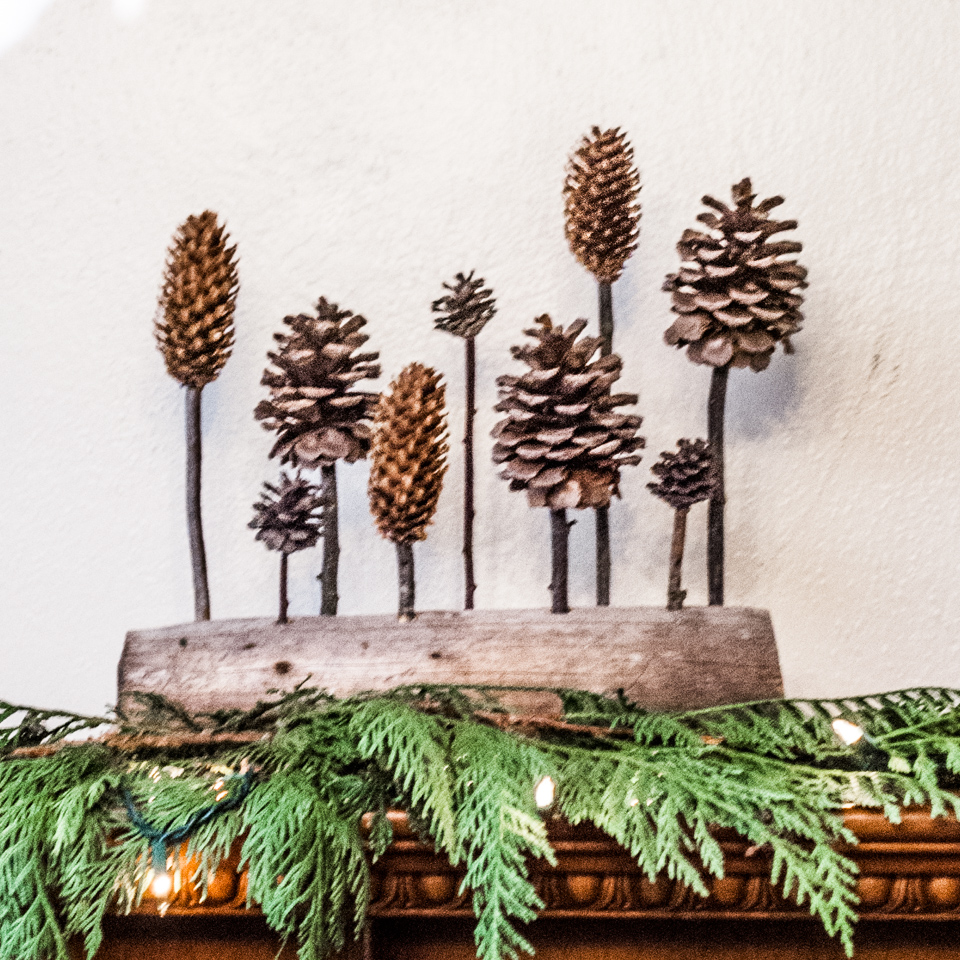
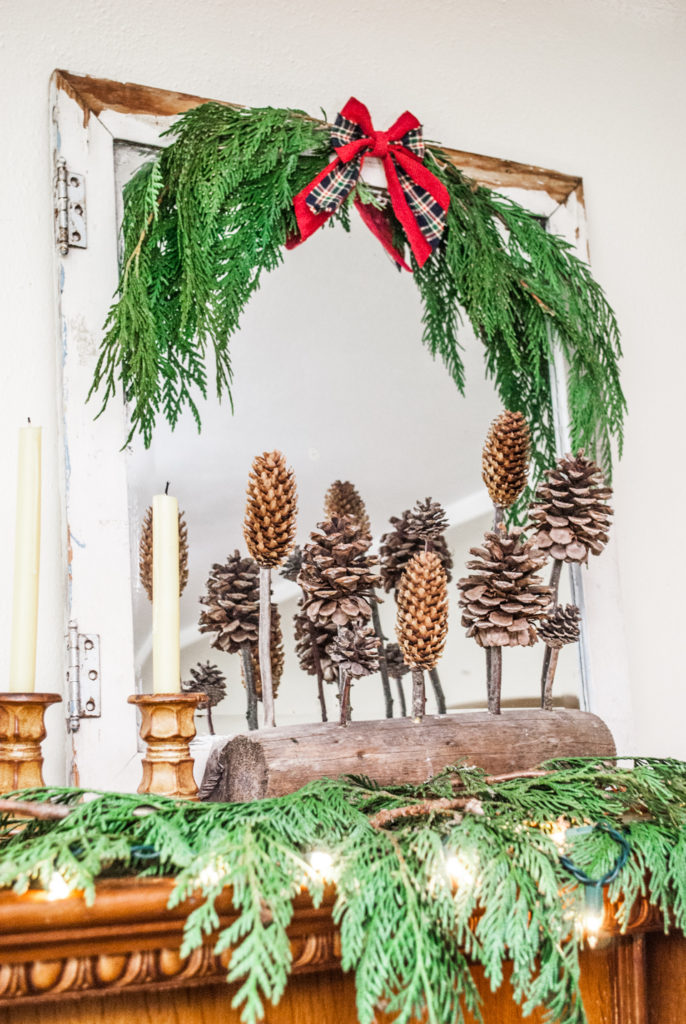
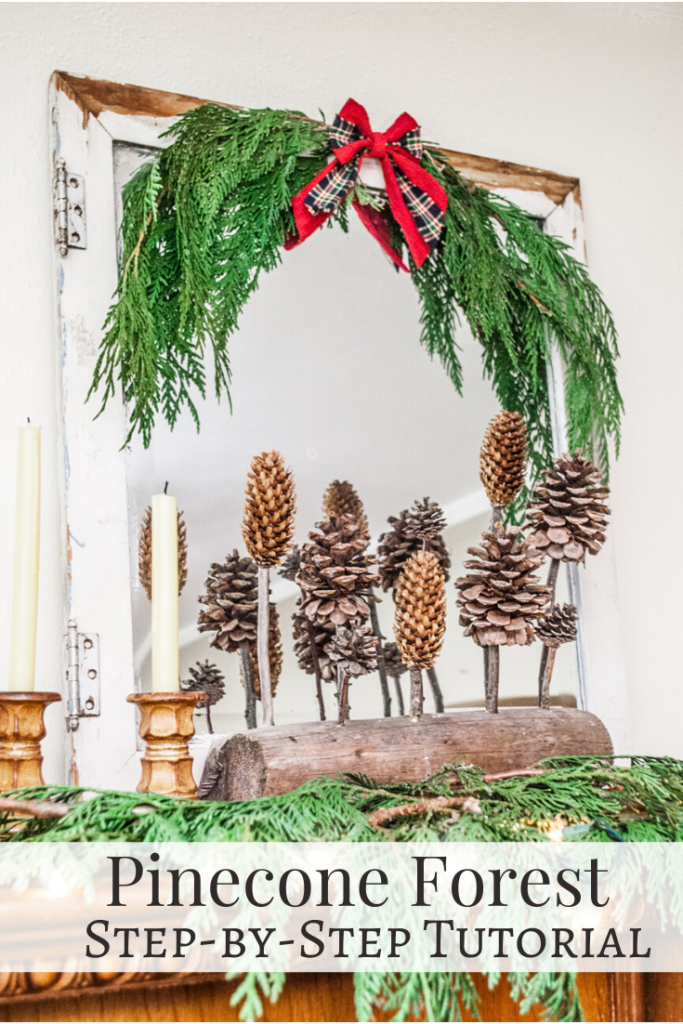
I’m so happy with how this little Pinecone Forest Sculpture turned out, and I have up on the top of my wardrobe with plenty of other greenery and my old chippy paint antique mirror.
How do you like it?
This craft is part of my Handmade Christmas Series, and I just know you’ll love all the simple and rustic crafts that you can find here:
- Rustic Little Tree Ornament
- Easy Fabric Wrap Ornaments
- Mini Christmas Tree Mobile
- The Simple Star
- Mini Christmas Trees
- Pinecone Door Hanger
- Cinnamon Stick Christmas Cross
- Simple Pinecone Garland
- Simple Pinecone & Bow Ornaments
- No-Sew Fabric Bow Garland
- Pinecone Forest Christmas Decor
Save this for later on Pinterest:


2 Comments
Lea Billingsley
This collection is so perfect. I love all the natural elements. My home is very rustic. My husband built it without a lot of sweet rock. We have old recycled lumber from a mill as ship lap siding on our walls. I’m going to try several projects from your collection for our rustic walls. Thank you so much for your creative ideas
Lea Billingsley
The above comment should say SHEETROCK OR DRYWALL NOT SWEET