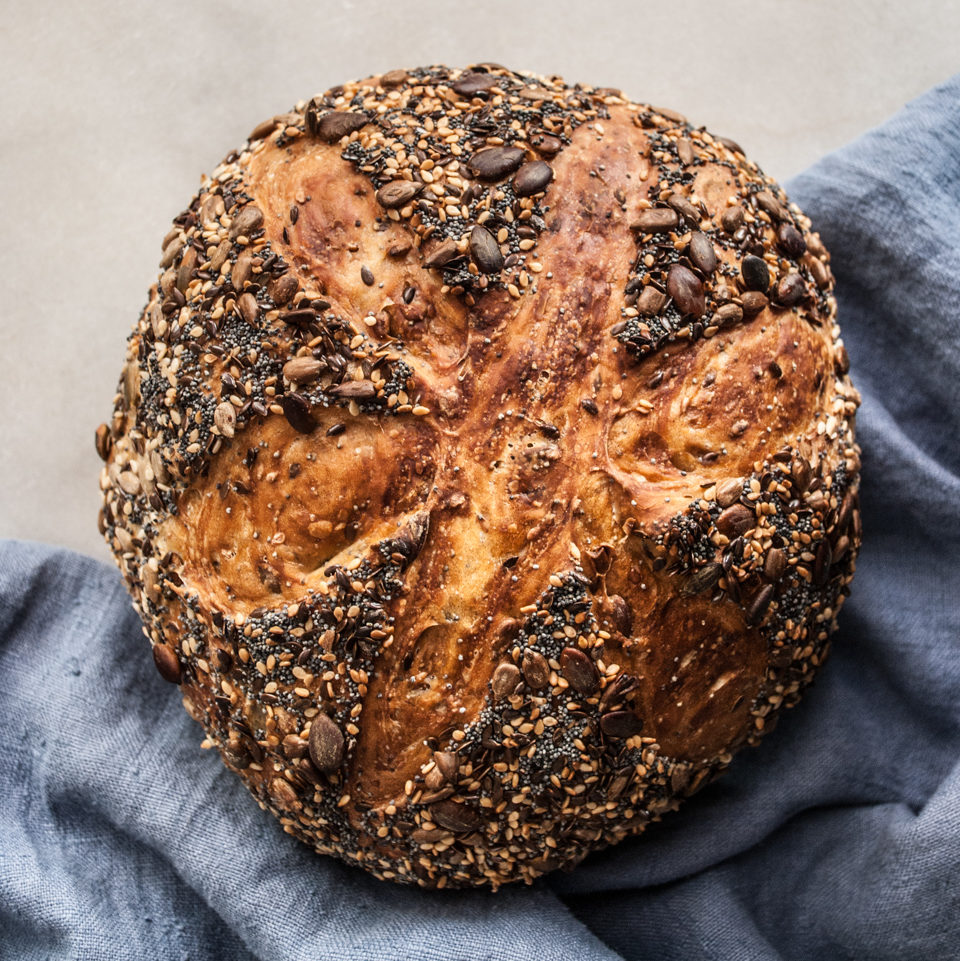
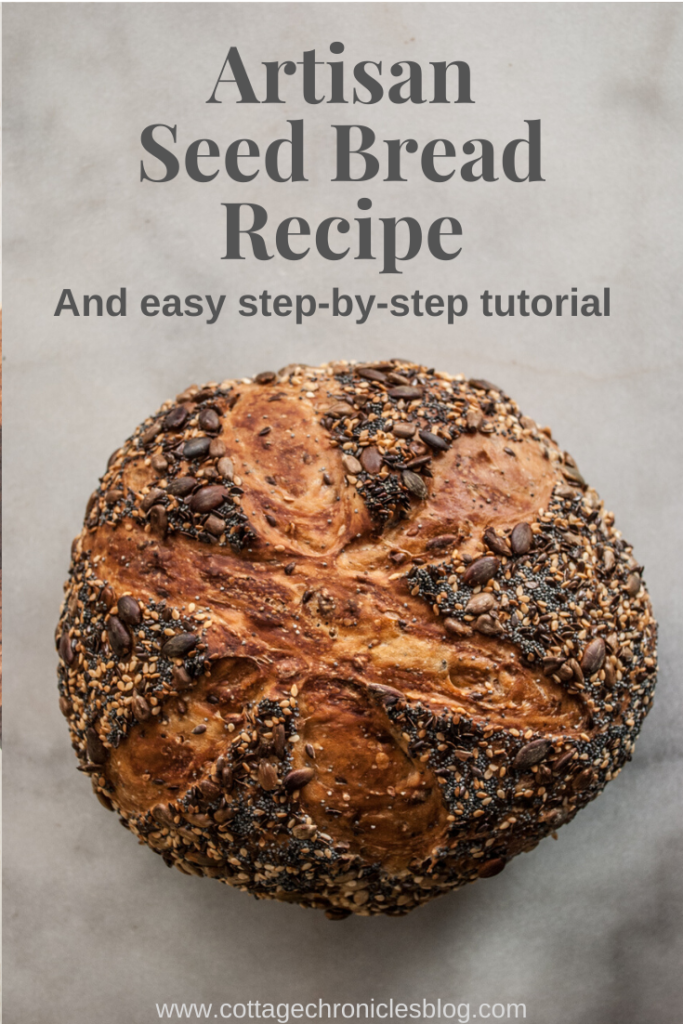
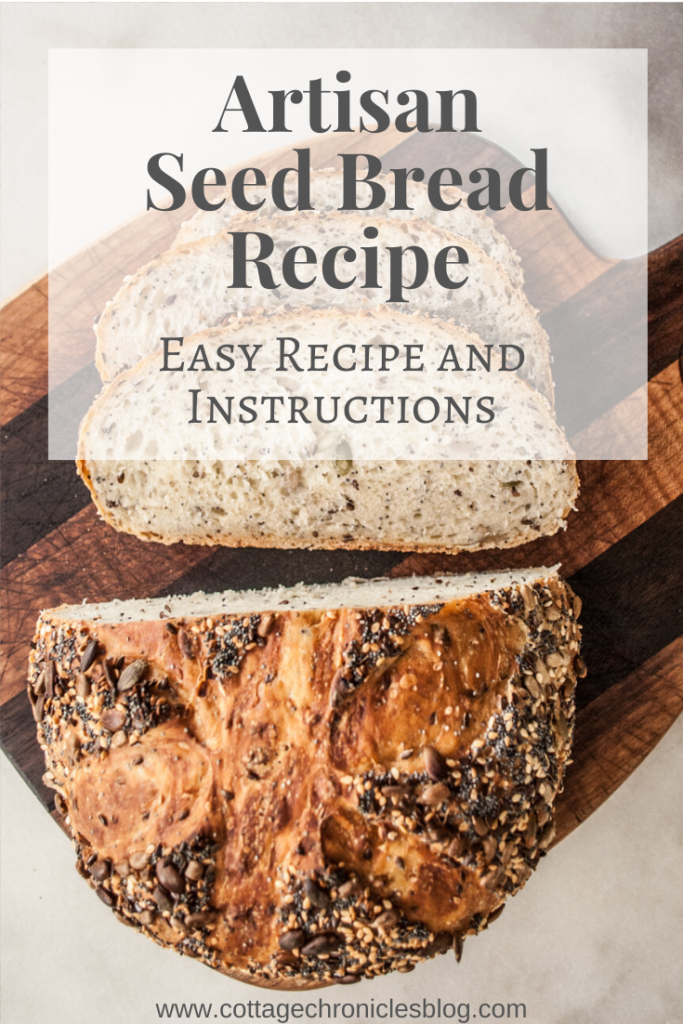
You will be delighted how easy to it is to create this impressive Artisan Bread! And the great news is, you can use any seed combination that you like! This recipe has poppy seeds, pumpkin seeds, sesame seeds, flax seeds and sunflower seeds. A perfect medley of flavors and textures! Watch the video below to see just how easy this bread is to whip up! (Printable Recipe is at the bottom of the post!)
Ingredients:
3 cups bread flour
¼ tsp. dry active yeast
1 ¼ tsp. salt
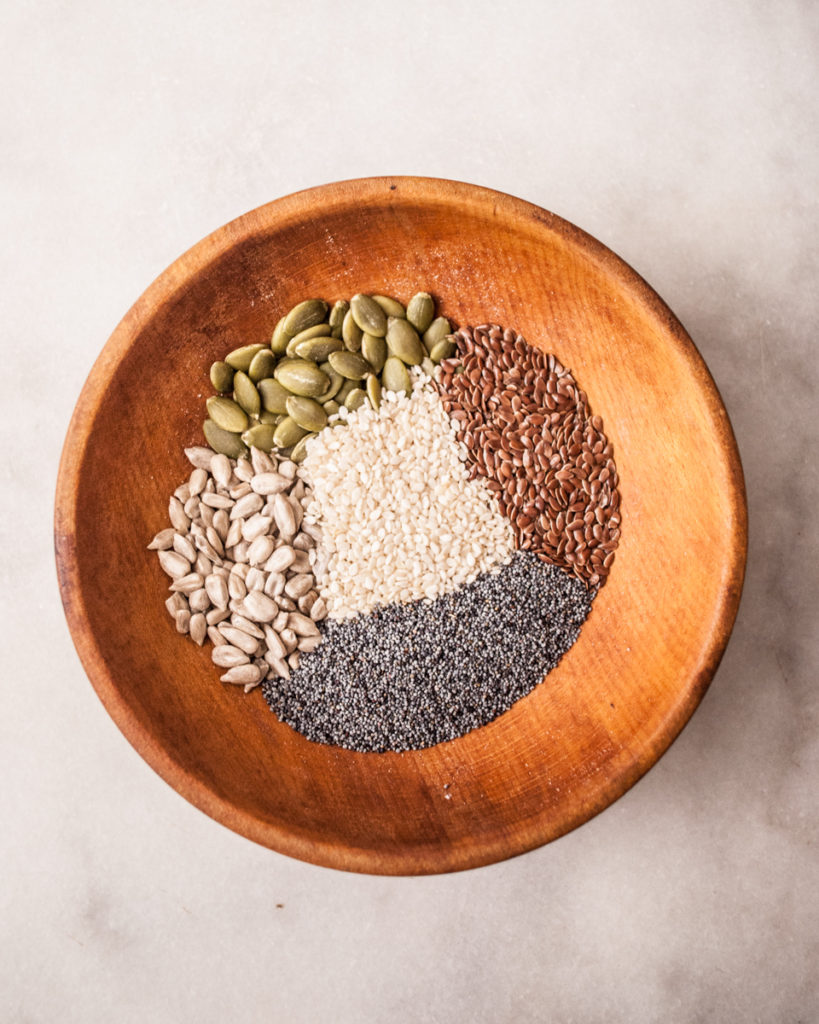
2 T. sunflower kernels
2 T. pumpkin seeds
1 T. flax seeds
1 T. poppy seeds
1 T. sesame seeds
1 ⅝ cups water
For the topping: (optional)
1 T. of each kind of seeds, all mixed together
Basic Instructions:
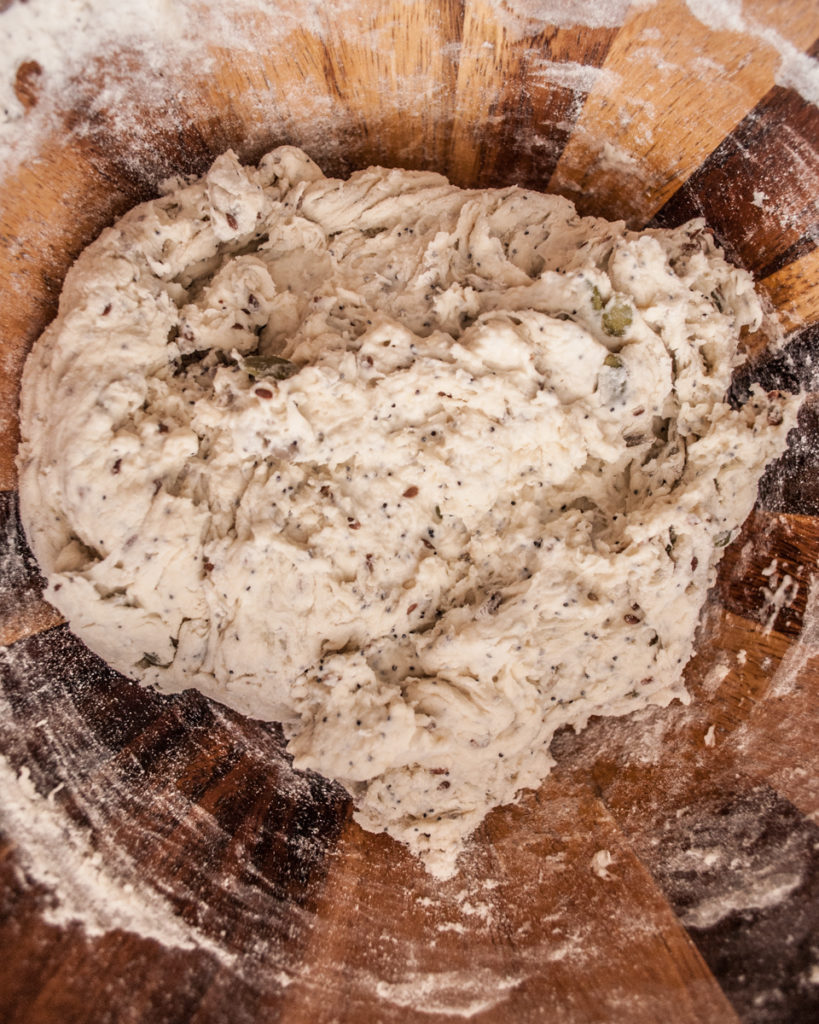
In a large bowl, mix together the flour, yeast, and salt, and all the seeds. Add the water and mix together with a wooden spoon until just combined. You will have a sticky, shaggy ball of dough. Cover the bowl with plastic wrap and let rise at room temperature for 12-18 hours, and do not disturb!
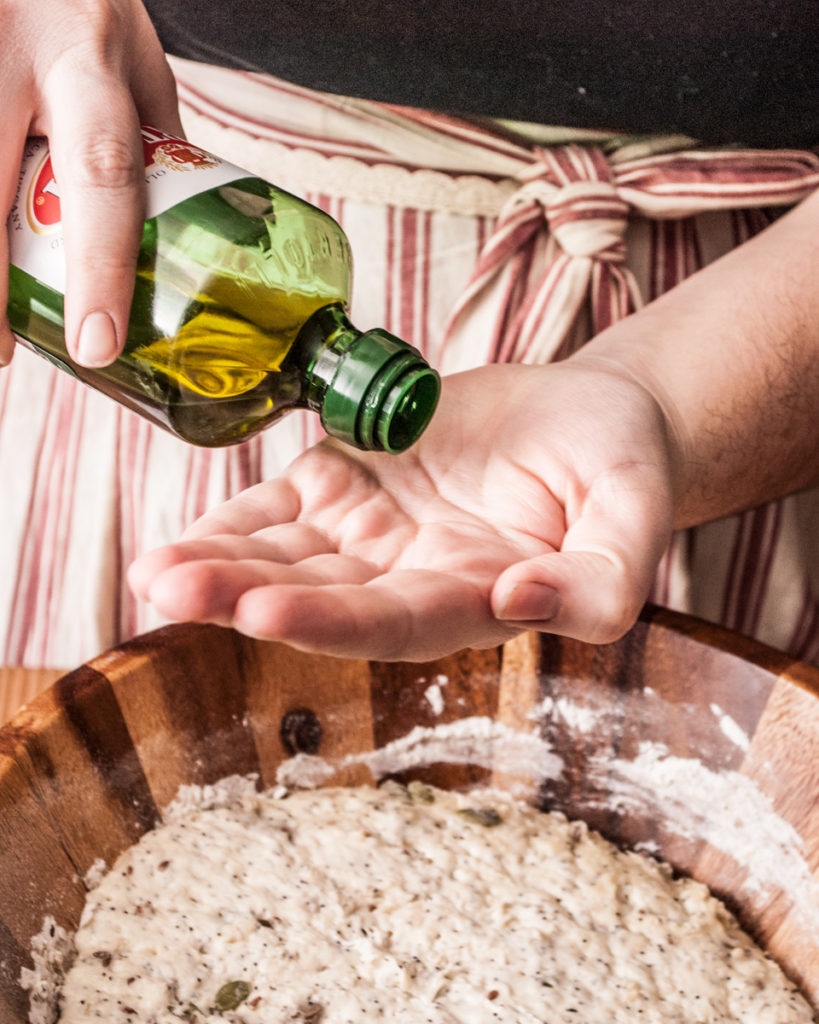
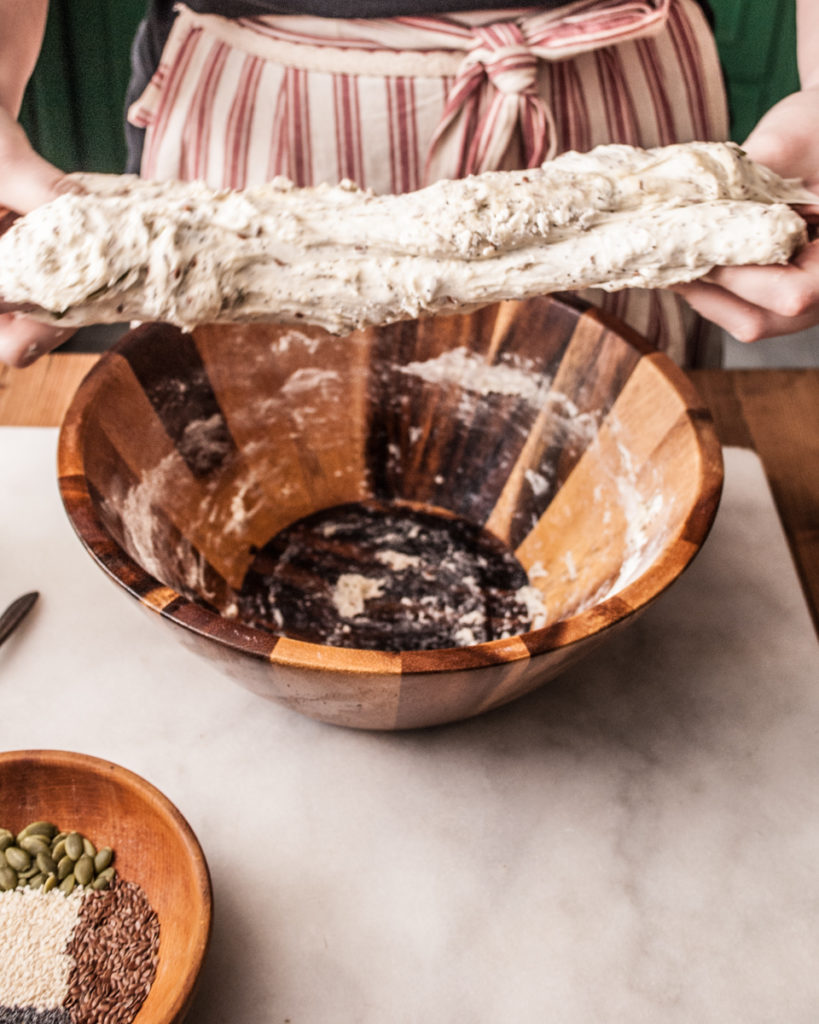
After rising, the dough will be very sticky! Cover your hands with oil, then stretch the dough and fold it into thirds. Then turn the dough 90° and stretch it out again, and fold it into thirds.
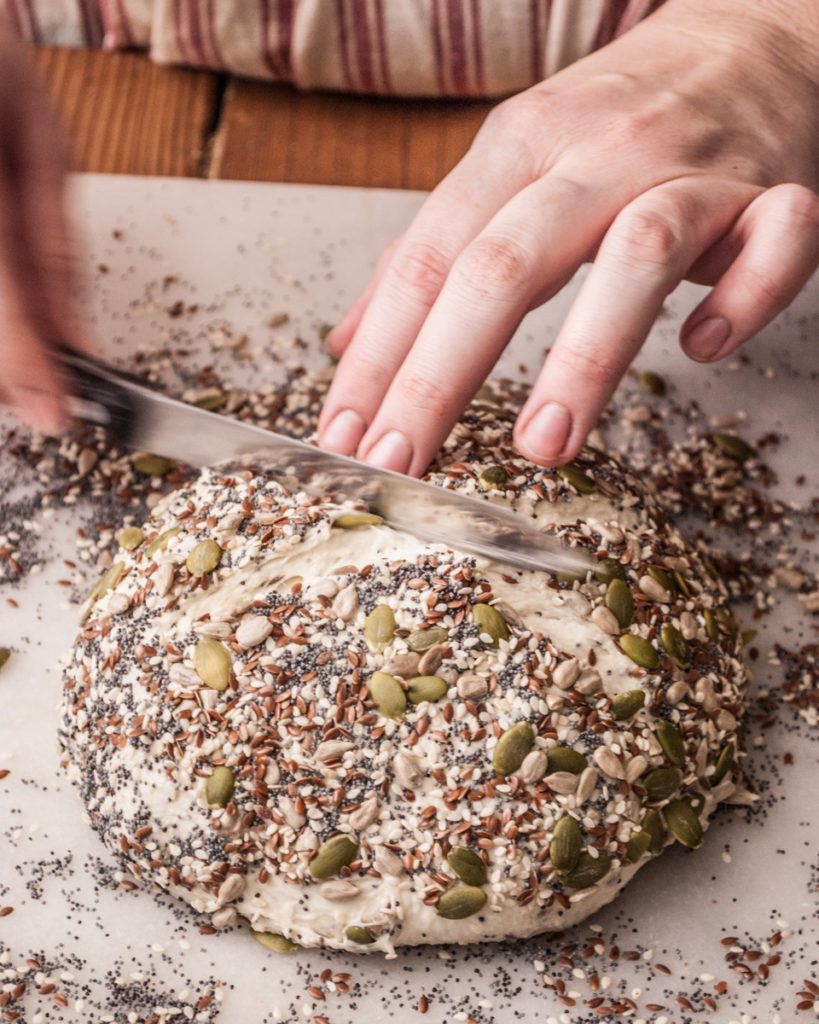
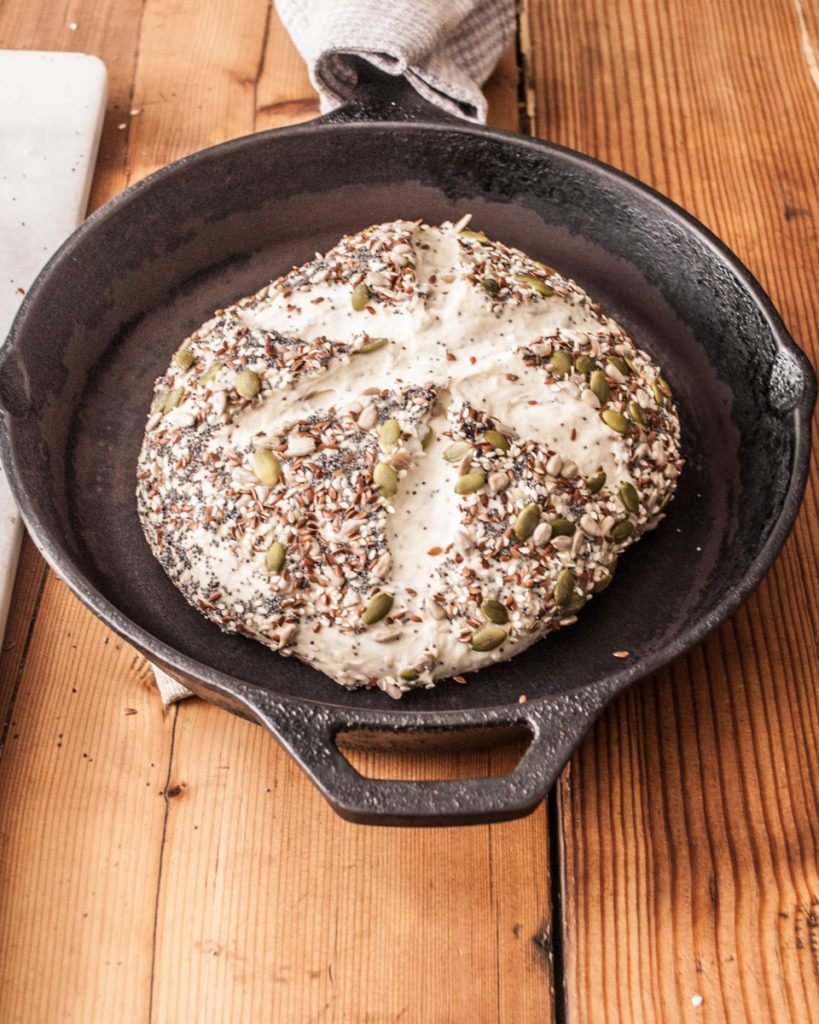
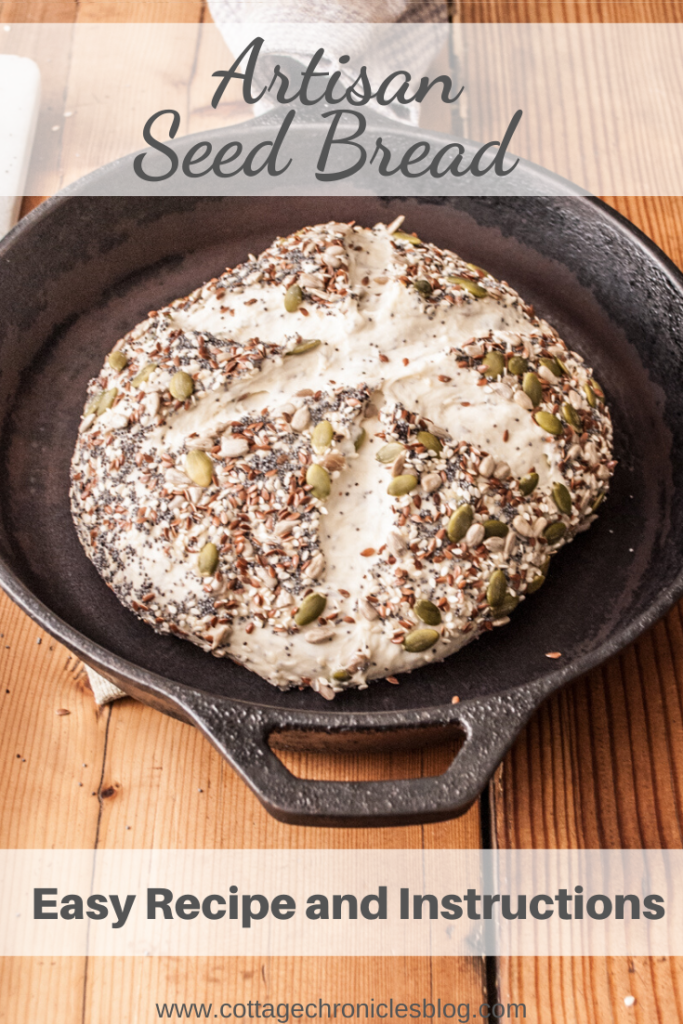
Gently shape the lump into a loaf with the ends tucked under, set aside.
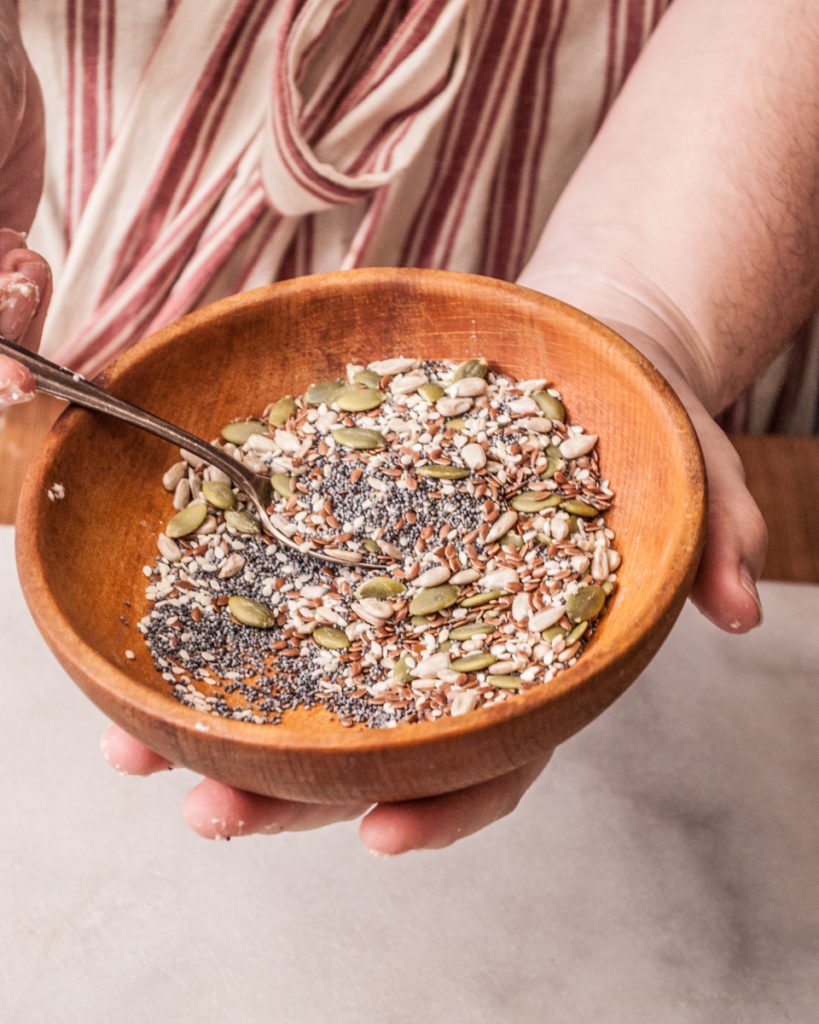
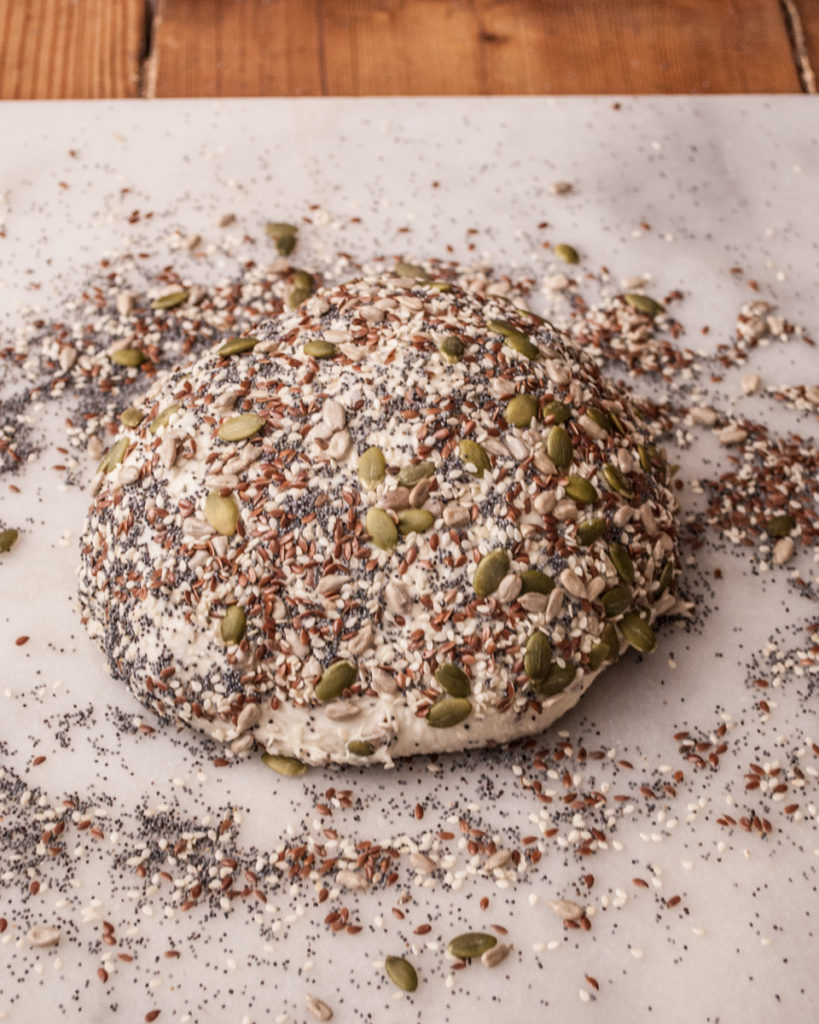
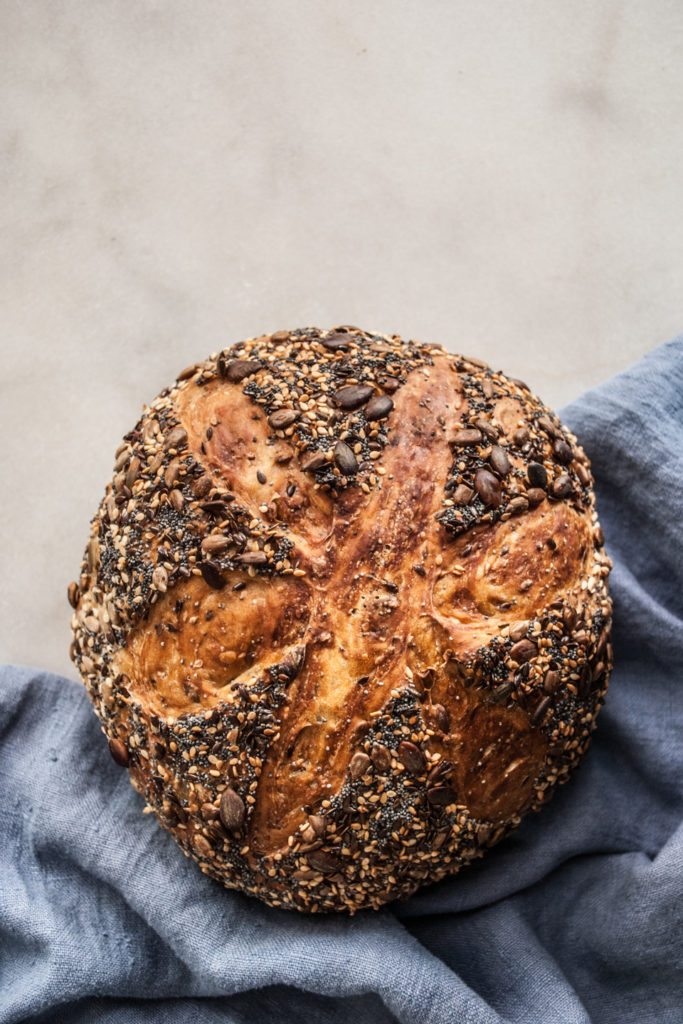
Pour the seed topping mixture onto a flat surface and spread it out, then roll the top and sides of the loaf in the seeds until it is well coated. Slash the top of the loaf, then allow the loaf to rest 15 minutes.
A few notes for the perfect bake:
Your oven should be very hot at 450 degrees Fahrenheit, and you should have a cast irons skillet heated in the oven. Transfer your loaf to the hot pan and get ready to pop it into the oven.
This next step is optional, but it will help your bread to form an amazing crust. For the best artisan style crust, you need to form steam in the oven just as the loaf goes in.
Some bakers us a spray bottle of water and spray inside the oven to create this steam. I have found that the easiest way for me is to just throw a few ice cubes in right before I pop the bread in.
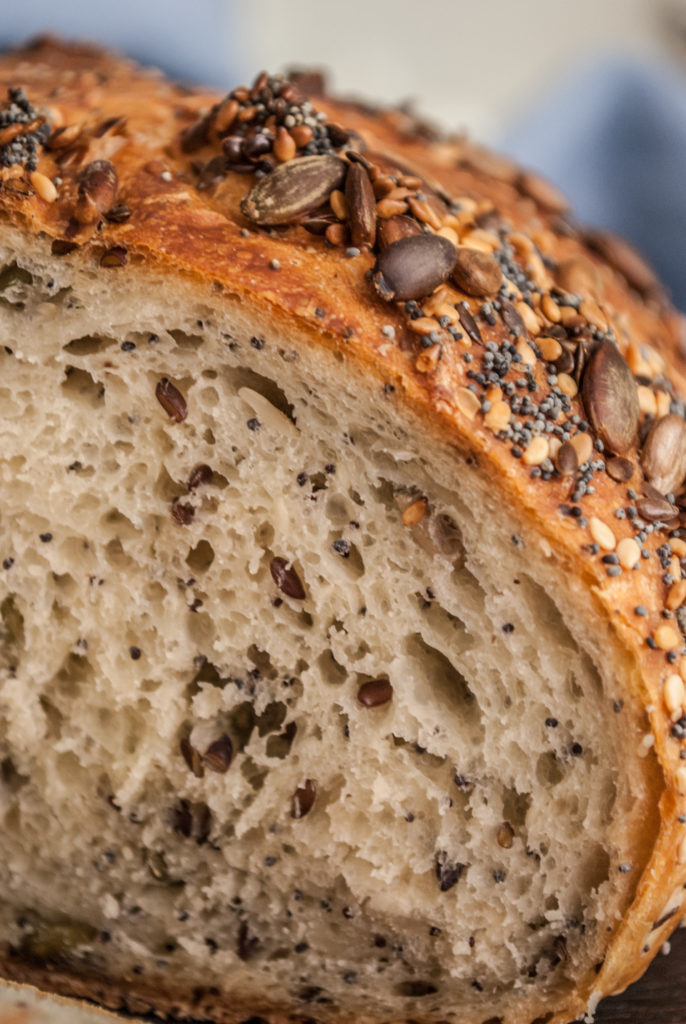
The steam in the oven will allow your bread to expand for longer before the crust hardens, and give you bigger bubbles and a better texture!
Bake 35-40 minutes. Allow to cool before slicing!
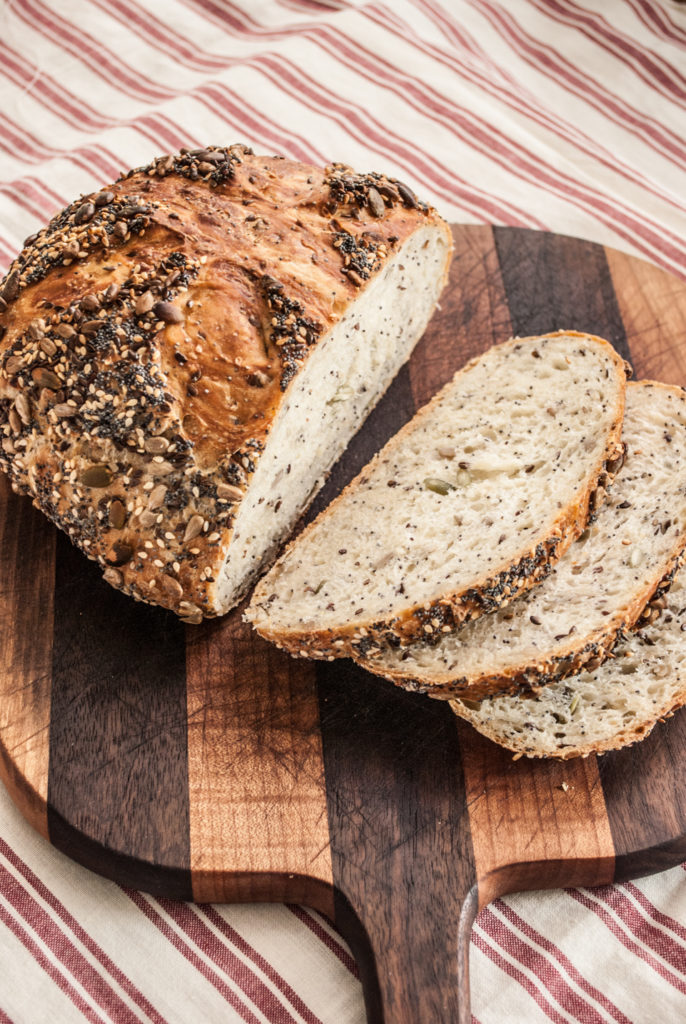
And that all there is to making amazing artisan seed bread. Please let me know how your loaf turns out! I loved this bread spread with cream cheese, or for a super delish grilled cheese sandwich.
It’s easier to work from a paper copy! Click below to print this recipe.
Save this for later on Pinterest:


31 Comments
Maria
Can the water be room temperature or should it be warmed up when mixed with the yeast? The bread looks delicious! Can’t wait to try it.
Michaela
when you say fold your bread in thirds,i am confused as to what you mean by that.
Lorie
I think she means fold it 3 times . Stretching and folding helps get layers and lots of bubbles especially with a no knead bread and a wetter dough
Pingback:
Lynne
Followed all directions, dough very sticky after letting it rise covered all night. What do I do now? Sticking to flowered cloth etc, even with oiled hands.
Help
Sandra
I used a silicon pastry sheet to work with the dough and had no sticky issues. Didn’t need flour at all, just some oil on my hands to get the dough out of the overnight bowl. The dough was very elastic but not sticky.
Knowing the internal temperature of the bread when done would be helpful though.
Diana
Looking forward to trying this recipe as well as the others in your free artisan bread recipe book thankyou for this book. The recipes look amazing
Julie
Beautiful bread, but can you provide the weight, either in grams or ounces of the flour? Weighing dry ingredients is the absolute key to baking success. Please provide this info. Thank you kindly.
Linda Ebright
Dough was a sloppy mess. Never had this happen with no knead overnight bread before. Impossible to handle and form a proper ball. Flour/Water ratio doesn’t seem correct.
Linda
Way too much water. Too sticky to work with even after some flour added when trying to fold. May do again with only 1 1/2 cups. Hopefully will bake up ok.
Cindy
Agree with the others! Too wet to hold any shape or to allow slashing. Maybe it is a matter of weighing the flour? Or do you actually use more flour when shaping? I’m sure you do it this way so there must be trick I don’t know!
Cheryl
Never in my life had any experience like this. Horrible sticky mess. 1/4 wasted
Couldn’t get out of bowl, couldn’t get off my hands and even ruined my clothes with sticky dough. Don’t know if it will be okay after baking but I’ve had such a bad experience I don’t even care.
Shay
One of the best artisan breads in a dutch oven that I have made. I just made a loaf of cranberry, flax, sunflower and pumpkin seed using this bread recipe
because the texture of the bread was sooo good! It’s currently in the oven. Fingers crossed! Thank you!
Nkarcher
Dough was so sticky I couldn’t even form a ball. Used oil on hands first and then used flour. I basically plopped the dough into pan to cook. I hope it works better than it looks.
Shirley
My husband and I love this bread recipe….I followed the recipe to a T and it turned out fantastic Thank You So Much Fot Sharing
Shirley Popp
I must tell that this seeded bread recipe is absolutely the best…..I’ve made it twice now and turned out great…..My husband asked me to make it again…..Thanks so much for sharing this and all your tips and tricks
Shirley Popp
I must tell that this seeded bread recipe is absolutely the best…..I’ve made it twice now and turned out great…..My husband asked me to make it again…..Thanks so much for sharing this and all your tips and tricks
Terri
I made your Artisan Seed bread it is so delicious thank you for sharing this fabulous
recipe! I got to thinking about your blog so I went to your YouTube channel and saw your beautiful family and all the great things you are doing. I have subscribed (#558) and looking forward to all the great things coming from you thank you so much for sharing. I will be making your eggs Florentine very soon looks delicious!!
Stephanie
Can you make in Dutch oven?
Diane DiMascio Wright
It’s still in the oven and has about ten minutes to go, but I took a peek and it looks beautiful! I can’t wait until we can taste it!
sheri L
Just mixed the dough, but I am worried about the water, should it have been warmed? I see nobody else seems to know either. Anyone?
Molly
I tried to make it as written and my dough didn’t rise at all. But I tried again with warm water (115 degrees) and included a small amount of honey and things went much better!
Kate
Amazing bread! I’ve made it a few times and tastes so good. And super easy
Alanood
Hi,I would like to ask if living in warm country that doesn’t effect the 12h resting time? Which room temperature show we let the dough rest in please ?
Cindy
Well, this is ridiculous. Follow the recipe exactly and it’s practically liquid. If you look at the picture after she combines ingredients, it is much more firm. I wonder I’d the amount of flour was entered incorrectly.
Pingback:
Sandra
Ummm, does anyone reply to comments…I want to make, but am hesitant. Is there to much water? not enough flour?
Ginny Sparks
It is messy for sure but worth it. I put my water n a little @ a time until is was shaggy dough. I ended not using all the water asked for. About 2 TBS left. The next morning it had risen & ready to stretch/fold before adding seeds. Have all equipment ready before touching the dough. Otherwise u will have to keep washing ur hands & that gets old.
1. Turn ur oven to 450 & let it heat up. Once it gets to temp, put cast iron in & heat for 30 min.
2. While it’s heating get supplies needed.
* Olive oil to put on hands before handling dough.
* If u have a pastry sheet, use it. It keeps the mess to a minimum.
* Have ur seeds spread on parchment paper so it’s ready to place the dough on the seeds.
* Have a bread lame or sharp knife ready to cut the top of the bread dough.
* I used a lid my cast iron with a lid for the first 20 min. I took the lid off & baked for another 15 min.
I hope this helps.
Leslie
Followed recipe and it turned out wonderful. Very delicious
Melody
Came out perfect. Will be making again. I may use less nuts and seeds on top. They fall off too much.
Mike
This recipe is amazing. Glad I found it. Delicious and easy to make.